Bitwarden is a free and open-source password management (password manager) service that stores sensitive information such as website credentials in an encrypted vault. The Bitwarden platform offers a variety of client applications including a web interface, desktop applications, browser extensions, mobile apps, and a CLI. In this step by step guide I will teach you how to install
BitWarden on your
Synology NAS device using Docker.
Note: This guide works perfectly with the latest version of Bitwarden 2.21.1
Please Support My work by Making a Donation.
Install Docker via Synology “
Package Center”.
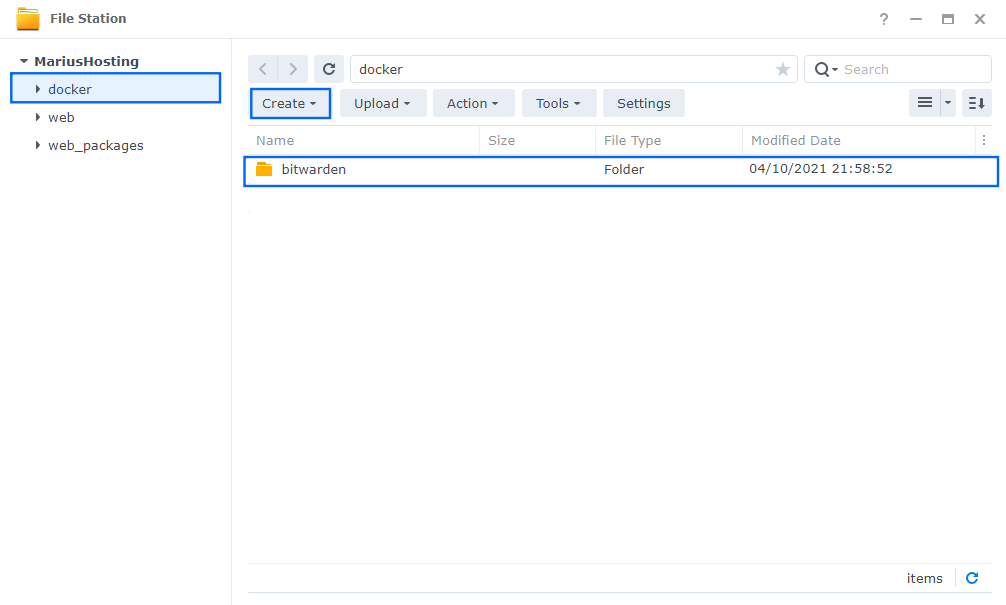
Go to
File Station and open the docker folder. Inside the docker folder, create one new folder and name it
bitwarden. Follow the instructions in the image below.
Note: Be careful to enter only lowercase, not uppercase letters.
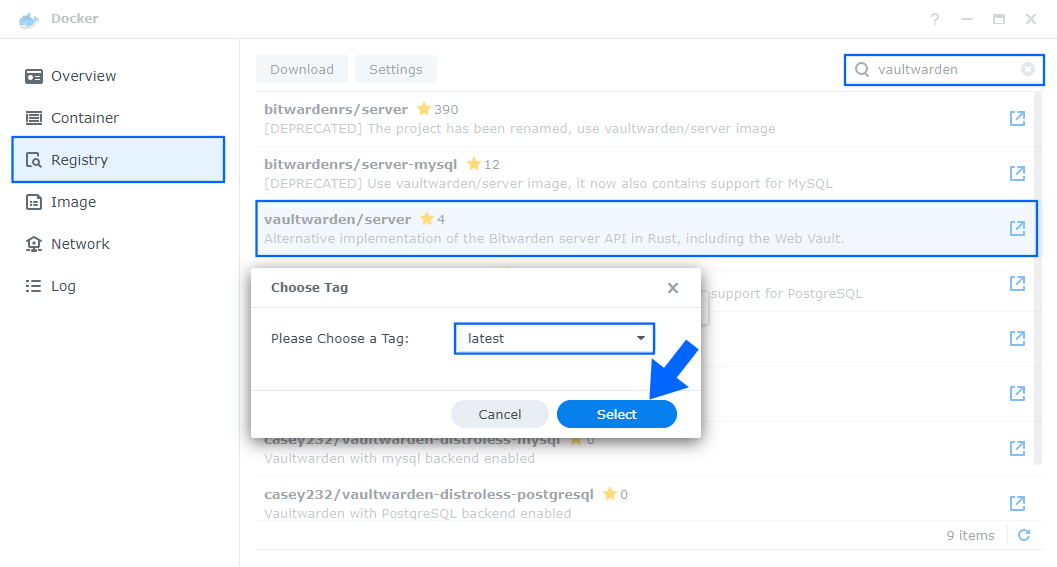
Open Docker Package. From the Docker Console, go to
Registry and search vaultwarden. Look for
vaultwarden/server and select it, then click Download or double click on it. You will be prompted to Choose a Tag, select latest. Follow the instructions in the image below.
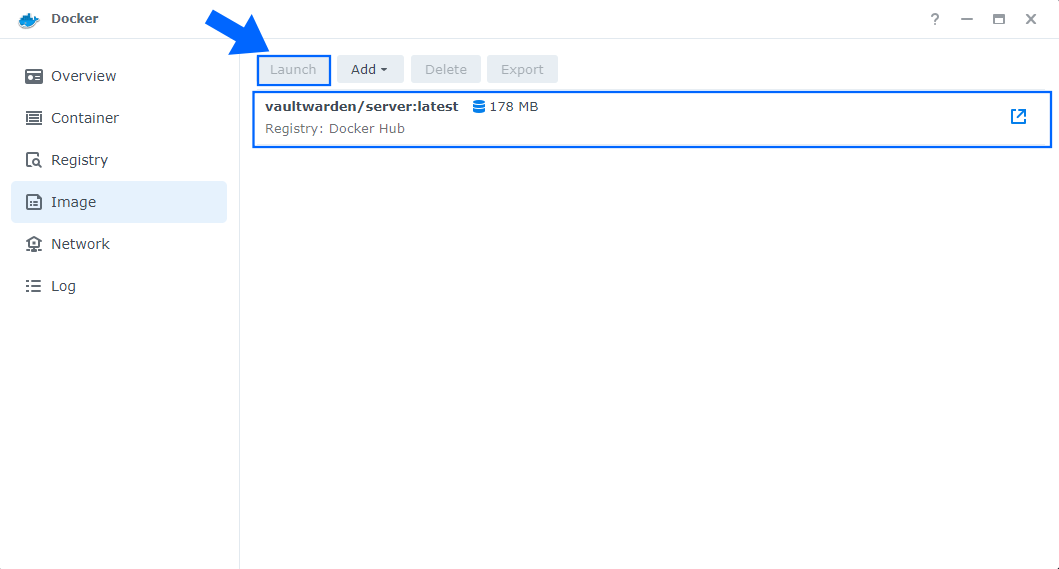
After you click “Select”, the download process of the vaultwarden docker image will start. You can click on Image on the Docker Console to see the download progress. The current container is about
178 MB. Select it and click
Launch. Follow the instructions in the image below.
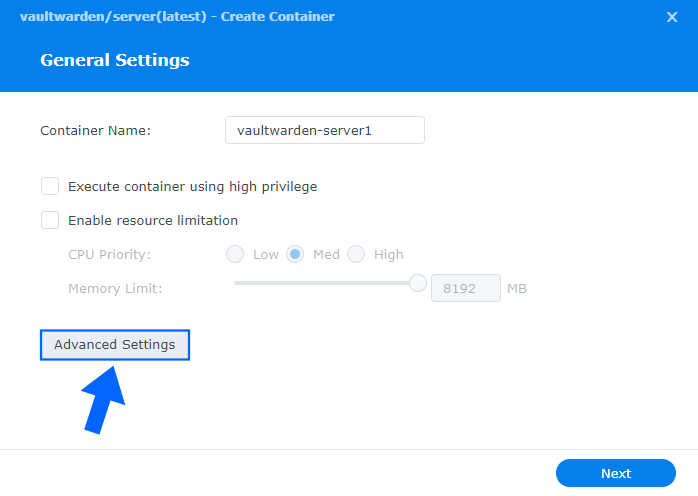
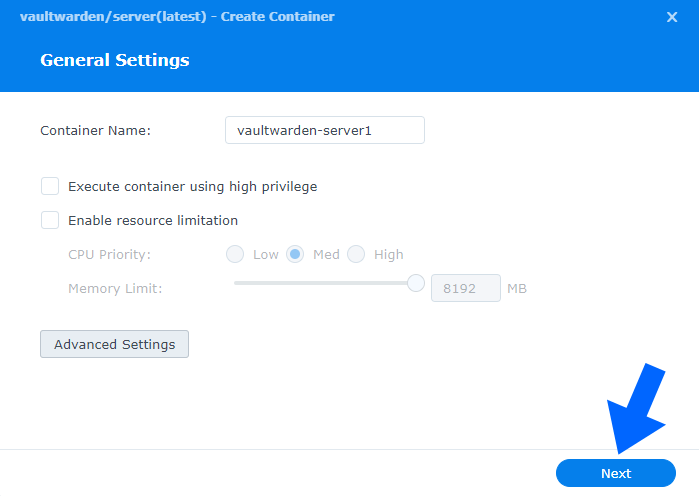
After you click Launch on
STEP 5 a new pop up window will open click
Advanced Settings. Follow the instructions in the image below.
Select “
Enable auto-restart”. Follow the instructions in the image below.
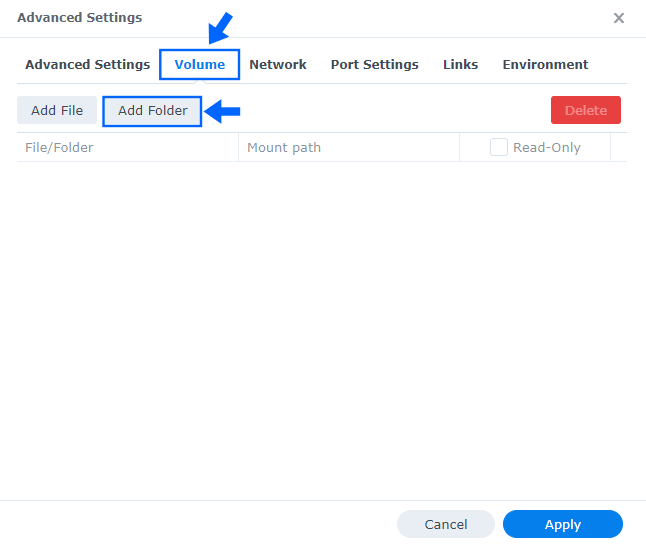
Next tab – “
Volume“. Select Add Folder. Follow the instructions in the image below.
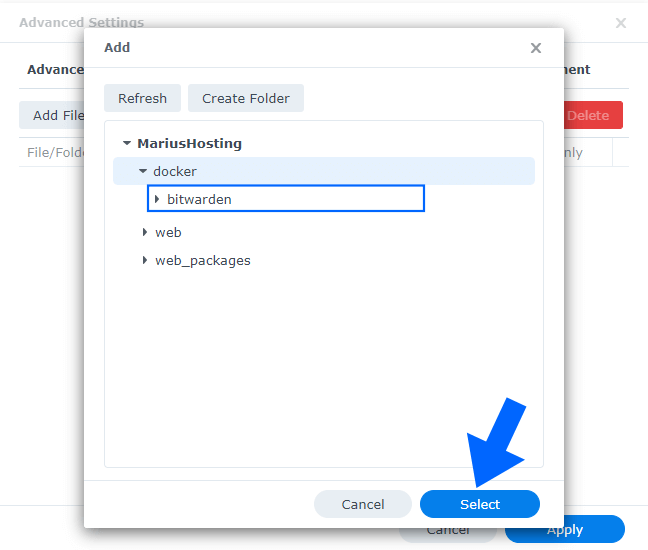
Choose the
bitwarden folder you have previously created in File Station at
STEP 3 then click
Select. Follow the instructions in the image below.
After you click Select, type
/data inside Mount path. Follow the instructions in the image below.
Next tab – “
Network“ move forward without doing anything (no action needed).
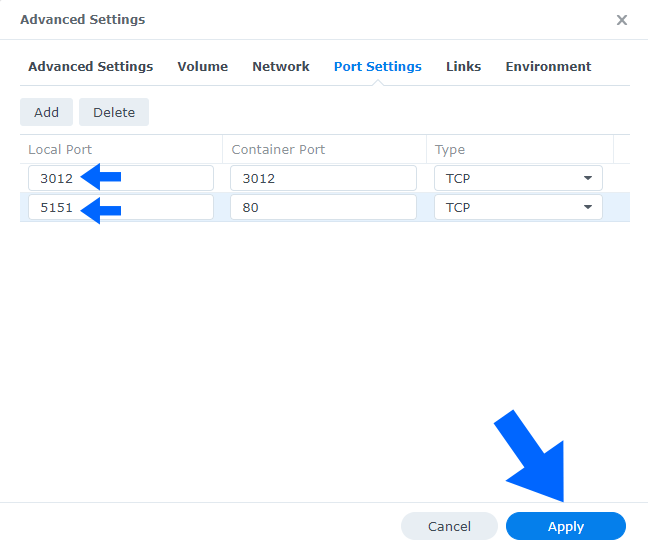
Next tab – “
Port Settings” on the Local Port area type in
3012 and
5151 instead of Auto then click
Apply. Follow the instructions in the image below.
After clicking “
Apply“ at
STEP 11, the screen below will open. Click “
Next“. Follow the instructions in the image below.
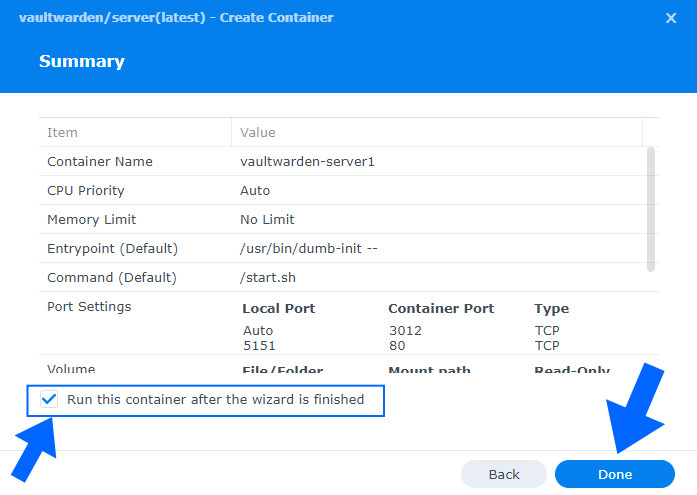
After clicking “
Next“, the screen below will open. Select “Run this container after the wizard is finished” then click “
Apply“. Follow the instructions in the image below.
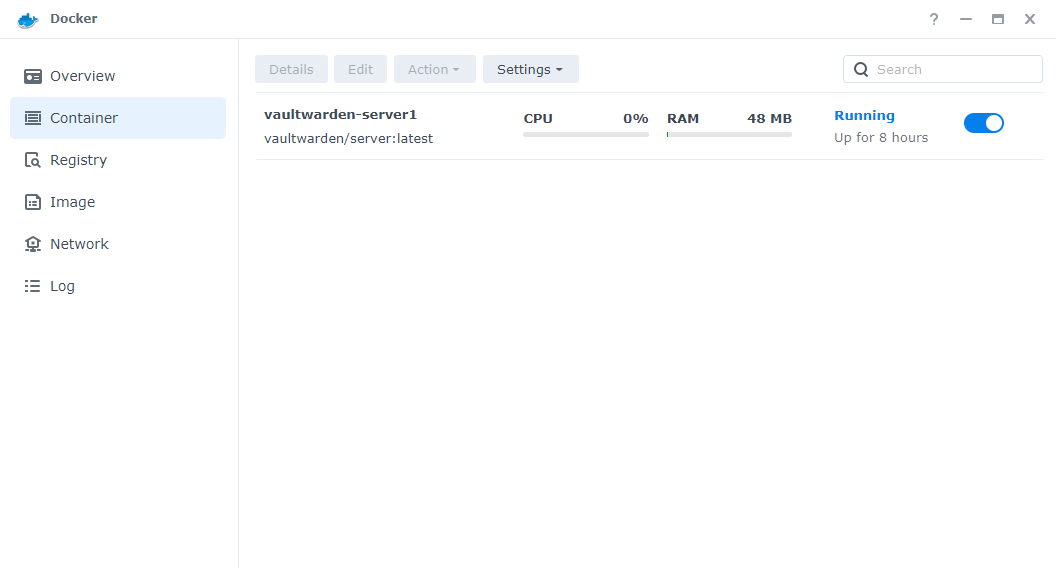
Your container will look like this:
Go back to
STEP 1 or you will deal with karma .
Now open your browser and type in
http://Synology-ip-address:5151/ Follow the instructions in the image below.
Note: If you want to run this container over an HTTPS check
How to Run Docker Containers Over HTTPS. Now you have self-hosted BitWarden running on your Synology NAS. Enjoy it and prepare to make it accessible via the Internet using a valid SSL certificate and a custom domain name.