In this article, I am going to show you how to export Office 365 mailboxes to PST files using a workaround which utilizes Office 365’s native in-place eDiscovery mechanism.
The reason why you may need to use it, is that Microsoft doesn’t provide any tools dedicated specifically for this purpose (like the New-MailboxExportRequest cmdlet in on-premises Exchange). In fact, if you want to export mailboxes to PST files to e.g. add a layer of extra protection to your Office 365 data or migrate away from Office 365, the eDiscovery mechanism is your only option, other than opening the mailboxes in Outlook and using its Import/Export functionality.
IMPORTANT: eDiscovery is supported in all Exchange Online plans and in selected Office 365 plans. For more see this TechNet article.
Note that this solution can also be used in Exchange 2016 and 2013.
System requirements:
1. After logging in to your Office 365 portal, access the Office 365 Admin center as shown in the below image.
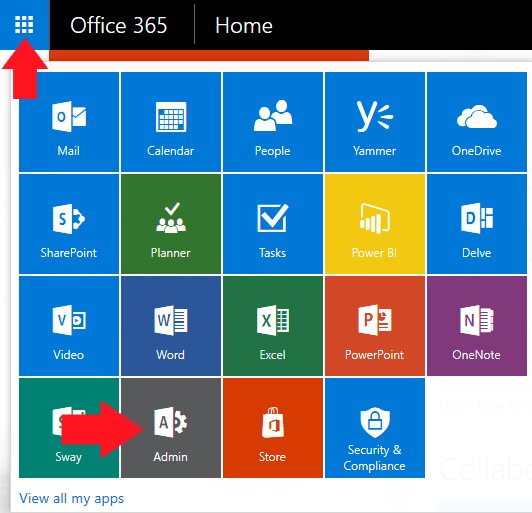
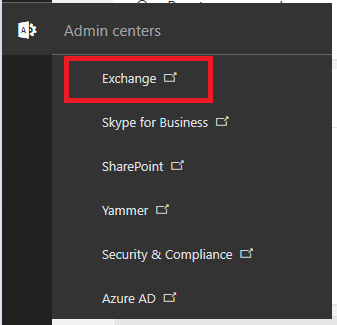
2. In your Office 365 admin center, expand Admin centers and click Exchange.
3. In your Exchange admin center go to permissions and double click Discovery Management.
This and the next step are necessary, because you need to be a member of the Discovery Management role group to be able to use eDiscovery features.

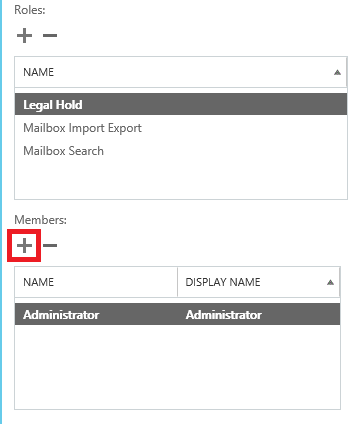
4. In the Discovery Management role group properties window add your account to the Members list using the plus button and click Save.
Make sure that Legal Hold, Mailbox Import Export and Mailbox Search roles are added in the Rolessection (if not, correct this using the plus button).
Note: You can also do this via PowerShell using the New-ManagementRoleAssignment cmdlet (e.g. New-ManagementRoleAssignment -Role “Mailbox Import Export” -User “administrator”). The role names are: Mailbox Import Export, Mailbox Search and Legal Hold. To learn how to manage Office 365 using PowerShell see: How to connect and remotely manage Office 365 with PowerShell
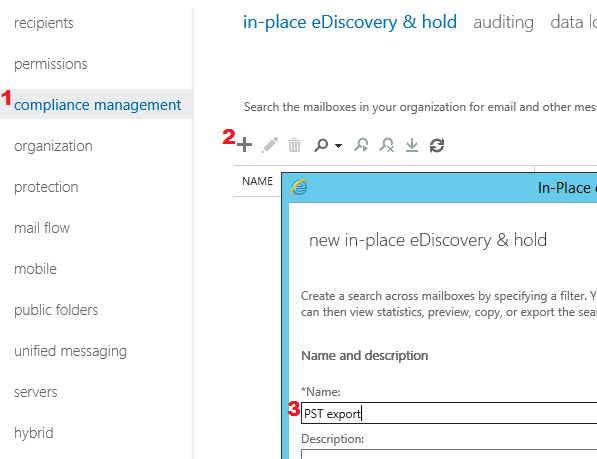
5. Back in Exchange admin center, go to compliance management, click the plus button to start a new in-place eDiscovery & hold wizard, type in a name and click Next.
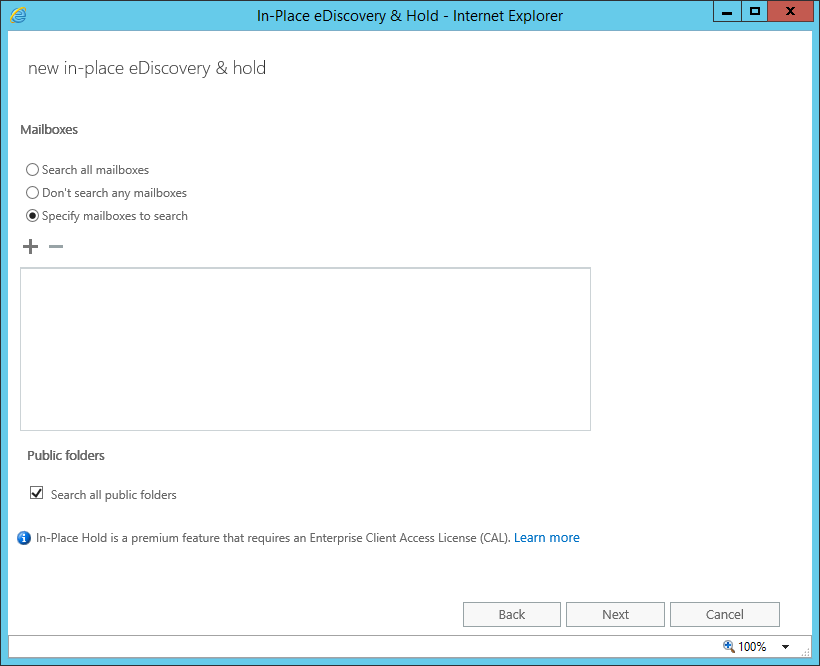
6. If you want to export data from all mailboxes, select Search all mailboxes.
Or select specific mailboxes using the Specify mailboxes to search option, and then clicking the plus button. This will open a new window – highlight the mailboxes you want to export data from, click add ->and OK.
Additionally, you can enable exporting from Public folders by checking the Search all public folders option (in the Public folders section at the bottom of the window)
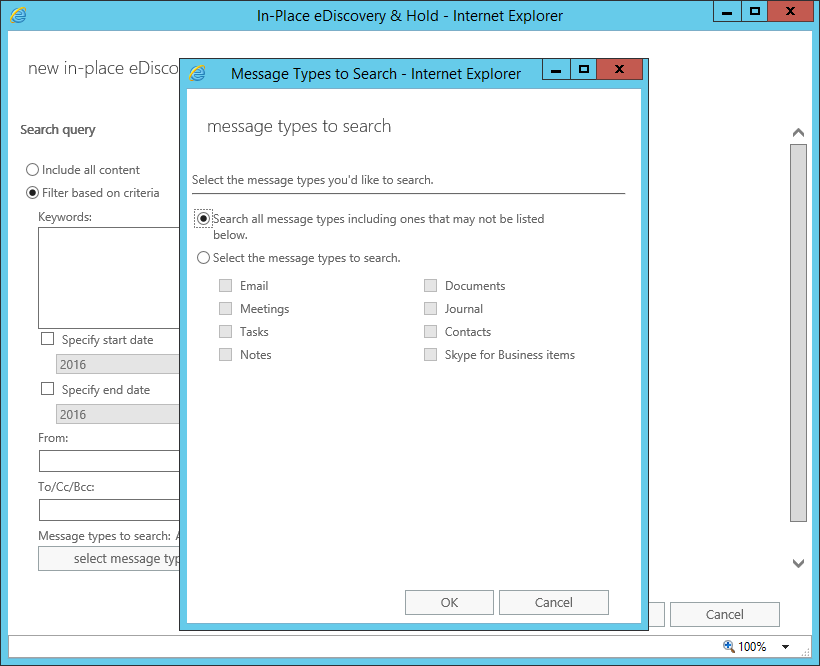
7. The next step gives you several filtering options (unless you want to export all data, in which case select Include all content):
8. The final step of the wizard is related to in-place hold settings, which don’t concern us in this scenario. After clicking Finish a dialog box will show the progress of settings being saved. When it finishes click Close.
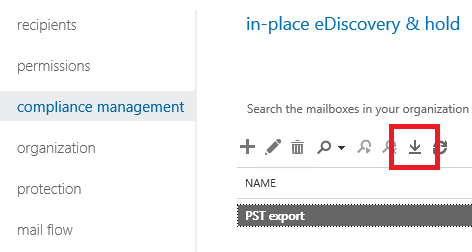
9. Now that you have set up an eDiscovery search, you can export its results to PST files. To do this, click the downward arrow button (marked red in image below).
10.this TechNet article.
After you click Start, the tool will begin the export. When it completes, close the application.
After performing the export, you can delete the eDicscovery search in compliance management, in-place eDiscovery & hold by highlighting it and clicking the trash button.
The reason why you may need to use it, is that Microsoft doesn’t provide any tools dedicated specifically for this purpose (like the New-MailboxExportRequest cmdlet in on-premises Exchange). In fact, if you want to export mailboxes to PST files to e.g. add a layer of extra protection to your Office 365 data or migrate away from Office 365, the eDiscovery mechanism is your only option, other than opening the mailboxes in Outlook and using its Import/Export functionality.
IMPORTANT: eDiscovery is supported in all Exchange Online plans and in selected Office 365 plans. For more see this TechNet article.
Note that this solution can also be used in Exchange 2016 and 2013.
System requirements:
- 32 and 64-bit versions of Windows 7 and later versions
- Microsoft .NET Framework 4.5
- Internet Explorer 10 and later versions, or Mozilla Firefox or Google Chrome, with the ClickOnce add-in installed
1. After logging in to your Office 365 portal, access the Office 365 Admin center as shown in the below image.
2. In your Office 365 admin center, expand Admin centers and click Exchange.
3. In your Exchange admin center go to permissions and double click Discovery Management.
This and the next step are necessary, because you need to be a member of the Discovery Management role group to be able to use eDiscovery features.
4. In the Discovery Management role group properties window add your account to the Members list using the plus button and click Save.
Make sure that Legal Hold, Mailbox Import Export and Mailbox Search roles are added in the Rolessection (if not, correct this using the plus button).
Note: You can also do this via PowerShell using the New-ManagementRoleAssignment cmdlet (e.g. New-ManagementRoleAssignment -Role “Mailbox Import Export” -User “administrator”). The role names are: Mailbox Import Export, Mailbox Search and Legal Hold. To learn how to manage Office 365 using PowerShell see: How to connect and remotely manage Office 365 with PowerShell
5. Back in Exchange admin center, go to compliance management, click the plus button to start a new in-place eDiscovery & hold wizard, type in a name and click Next.
6. If you want to export data from all mailboxes, select Search all mailboxes.
Or select specific mailboxes using the Specify mailboxes to search option, and then clicking the plus button. This will open a new window – highlight the mailboxes you want to export data from, click add ->and OK.
Additionally, you can enable exporting from Public folders by checking the Search all public folders option (in the Public folders section at the bottom of the window)
7. The next step gives you several filtering options (unless you want to export all data, in which case select Include all content):
- keywords/phrases (separated by logical operators: AND, OR, NEAR, NOT, etc.)
- time ranges
- From/To/CC/BCC fields
- and message types (which can be defined in the window that opens when you click the select message types… button).
8. The final step of the wizard is related to in-place hold settings, which don’t concern us in this scenario. After clicking Finish a dialog box will show the progress of settings being saved. When it finishes click Close.
9. Now that you have set up an eDiscovery search, you can export its results to PST files. To do this, click the downward arrow button (marked red in image below).
10.this TechNet article.
After you click Start, the tool will begin the export. When it completes, close the application.
After performing the export, you can delete the eDicscovery search in compliance management, in-place eDiscovery & hold by highlighting it and clicking the trash button.